 ドキュメント
モーション制御開発ガイド
本ドキュメントでは、BXI Elf3 ロボットのモーション制御開発手順について説明します。
プロジェクトリポジトリ:bxi_rl_controller_ros2_example(導入ユーザー様に HumansX より提供します)。README を必ずよくお読みください。
ロボットコントローラーのルートディレクトリにある bxi_ws フォルダに、モーション制御プログラムが格納されています。
ロボットプログラムの起動
自動起動の仕組み
ロボットコントローラーの電源が入ると、systemd サービス ros_elf_launch.service によってロボットプログラムが自動的に起動します。起動処理は次の 2 段階で構成されています。
- 自動起動サービス:
ros_elf_launch.serviceがブート時のエントリポイントであり、リモコンプログラムremote_controller/remote_conroller_launch.pyをバックグラウンドで起動します。 - 実機プログラム:リモコン用 launch ファイル
remote_conroller_launch.pyには、実機プログラムを起動するロジックが含まれています(リモコンの右スティックを押し込むと起動します)。自動起動される実機プログラムは、デフォルトで~/bxi_ws/bxi_rl_controller_ros2_exampleにあります。
ros_elf_launch.service を停止してください。バックグラウンドで動作しているデフォルトノードと、手動で起動したノードとの競合を防ぐためです。自動起動サービスの管理
systemctl コマンドの前に sudo を付けてください。# サービスの状態を確認
systemctl status ros_elf_launch.service
# サービスを開始
systemctl start ros_elf_launch.service
# サービスを再起動
systemctl restart ros_elf_launch.service
# サービスを停止
systemctl stop ros_elf_launch.service
# 起動時の自動起動を有効化
systemctl enable ros_elf_launch.service
# 起動時の自動起動を無効化
systemctl disable ros_elf_launch.servicelaunch ファイルまたはノードの手動起動
手動でデバッグする前に、まずデフォルトのサービスを停止してください。
systemctl stop ros_elf_launch.serviceシミュレーションプログラムの起動
source /opt/bxi/bxi_ros2_pkg/setup.bash
cd bxi_ws/bxi_rl_controller_ros2_example
source install/setup.bash
ros2 launch bxi_example_py_elf3 example_demo.launch.py
実機プログラムの起動
sudo su
source /opt/bxi/bxi_ros2_pkg/setup.bash
cd /home/bxi/bxi_ws/bxi_rl_controller_ros2_example
source install/setup.bash
ros2 launch bxi_example_py_elf3 example_demo_hw.launch.py
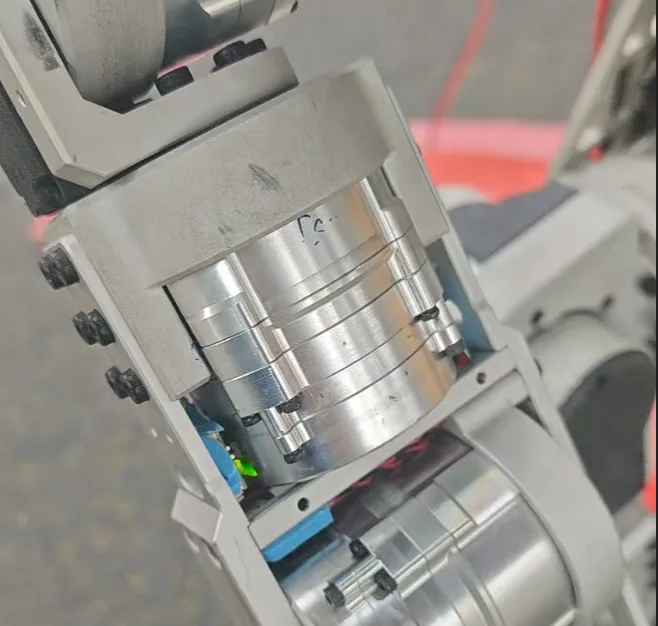
起動するとモーターに電源が入り、すべてのモーターのインジケーター LED が緑色に点灯します。ロボットはセルフチェックを開始します。約 6 秒後も緑色の点灯が続いていれば、セルフチェックは正常に完了しています。
リモコンプログラムの起動
# 実機
sudo su
source /opt/bxi/bxi_ros2_pkg/setup.bash
cd /home/bxi/bxi_ws/bxi_rl_controller_ros2_example
source install/setup.bash
ros2 launch remote_controller remote_controller_launch.py

# シミュレーション
source /opt/bxi/bxi_ros2_pkg/setup.bash
cd ~/bxi_ws/bxi_rl_controller_ros2_example
source install/setup.bash
ros2 launch remote_controller remote_controller_launch.py
単一のノードを起動する場合は、環境を source したうえで次を実行します。
ros2 run <package_name> <executable_name>二次開発ガイド
適切な変更レベルの選択
| 目的 | 推奨する方法 |
|---|---|
| 独自ロジックでロボットの動作を制御したい | /motion_commands にパブリッシュする独自の制御ノードを追加する |
| ロボットのモーション制御モデルを変更したい | bxi_example_demo.py と example_demo_hw.launch.py を変更する |
まずはレベル 1 から始めてください:公式のモーション制御プログラムはそのまま残し、/motion_commands をパブリッシュするノードだけを置き換えます。自動起動サービスやその起動スクリプトは、デフォルトの起動動作を変更する必要がある場合にのみ変更してください。
各レベルの注意事項:
- 独自の制御ノード:デバッグ前に
ros_elf_launch.serviceまたはデフォルトのリモコンノードを停止し、複数のノードが同時に制御コマンドをパブリッシュしないようにしてください。 - launch ファイルおよびメインプログラムの変更:デフォルトのプログラムは
~/bxi_ws/bxi_rl_controller_ros2_example/src/bxi_example_py_elf3にあります。変更後は再ビルドし、ワークスペースを再度 source したうえで、ros2 launchまたはサービスの再起動で動作を確認してください。
独自コントローラーノードの追加
手順 1:自動起動サービスを停止する
systemctl stop ros_elf_launch.service
# または
killall remote_controller
メッセージ型
起動後、ロボットは /motion_commands トピックをサブスクライブします。メッセージ型は bxi_ros2_pkg で定義されたカスタムメッセージ communication/msg/MotionCommands です。
std_msgs/Header header
    builtin_interfaces/Time stamp
        int32 sec
        uint32 nanosec
    string frame_id
geometry_msgs/Vector3 vel_des
    float64 x
    float64 y
    float64 z
float32 height_des
float32 yawdot_des
int32 mode
int32 btn_1  ... int32 btn_10
int32 axis_1 ... int32 axis_10
手順 2:パブリッシャーを作成する
C++ の例
1. パッケージの作成
# my_cpp_pkg は任意のパッケージ名に置き換えてください
ros2 pkg create my_cpp_pkg --build-type ament_cmake --dependencies rclcpp std_msgs
2. ノードの作成
src/ 配下に main.cpp を作成します。
#include "rclcpp/rclcpp.hpp"
#include "std_msgs/msg/string.hpp"
#include <communication/msg/motion_commands.hpp>

using namespace std::chrono_literals;

class MotionCtrl : public rclcpp::Node
{
public:
    MotionCtrl() : Node("motion_ctrl")
    {
        publisher_ = this->create_publisher<communication::msg::MotionCommands>("/motion_commands", 20);
        timer_ = this->create_wall_timer(500ms, std::bind(&MotionCtrl::timer_callback, this));
    }

private:
    void timer_callback()
    {
        auto message = communication::msg::MotionCommands();
        message.header.stamp = this->get_clock()->now();
        message.header.frame_id = "";
        message.vel_des.x = 0.5;  // 前後方向の速度
        message.yawdot_des = 0.5; // ヨー回転速度
        publisher_->publish(message);
    }

    rclcpp::Publisher<communication::msg::MotionCommands>::SharedPtr publisher_;
    rclcpp::TimerBase::SharedPtr timer_;
};

int main(int argc, char **argv)
{
    rclcpp::init(argc, argv);
    rclcpp::spin(std::make_shared<MotionCtrl>());
    rclcpp::shutdown();
    return 0;
}
CMakeLists.txt に以下を追加します。
find_package(communication REQUIRED)
add_executable(cpp_node src/main.cpp)
ament_target_dependencies(cpp_node rclcpp std_msgs communication)

install(TARGETS
  cpp_node
  DESTINATION lib/${PROJECT_NAME}
)
3. ビルドと実行
colcon build
source install/setup.bash
ros2 run my_cpp_pkg cpp_node
Python の例
1. パッケージの作成
# my_py_pkg は任意のパッケージ名に置き換えてください
ros2 pkg create my_py_pkg --build-type ament_python --dependencies rclpy std_msgs
2. ノードの作成
my_py_pkg/motion_ctrl.py を作成します。
import rclpy
from rclpy.node import Node
from communication.msg import MotionCommands


class MotionCtrl(Node):
    def __init__(self):
        super().__init__('motion_ctrl')
        self.publisher_ = self.create_publisher(MotionCommands, '/motion_commands', 20)
        self.timer = self.create_timer(0.5, self.timer_callback)

    def timer_callback(self):
        message = MotionCommands()
        message.header.stamp = self.get_clock().now().to_msg()
        message.header.frame_id = ''
        message.vel_des.x = 0.5   # 前後方向の速度
        message.yawdot_des = 0.5  # ヨー回転速度
        self.publisher_.publish(message)


def main(args=None):
    rclpy.init(args=args)
    node = MotionCtrl()
    try:
        rclpy.spin(node)
    finally:
        node.destroy_node()
        rclpy.shutdown()


if __name__ == '__main__':
    main()
package.xml に依存関係を追加します。
<depend>communication</depend>setup.py にエントリポイントを登録します。
entry_points={
    'console_scripts': [
        'motion_ctrl = my_py_pkg.motion_ctrl:main',
    ],
},
3. ビルドと実行
colcon build
source install/setup.bash
ros2 run my_py_pkg motion_ctrl
FAQ
1. 実機プログラムが起動しない場合のログ確認方法
公式プログラムのログは /var/log/bxi_log/ に時刻順で保存されています。最新のログファイルを開いて詳細を確認してください。
2. 自動起動サービスの状態確認
systemctl status ros_elf_launch.service出力から、サービスが読み込まれているか、現在アクティブかどうかを確認できます。